Git
As you may remember from our last lecture, Git is the free and open source version control system which GitHub is built on.
One of the main benefits of using the Git system is its compatibility with RStudio; however, in order to link the two software together, we first need to download and install Git on your computer.
Downloading and installing Git
To download Git, go to https://git-scm.com/download. You should arrive at a webpage like this:

Downloading Git from git-scm.com/download
Click on the appropriate download link for your operating system. This should initiate the download process.
For Windows
Once the download is finished, open the .exe file to initiate the installation wizard. If you receive a security warning, click “Run” and/or “Allow.” Following this, click through the installation wizard, generally accepting the default options unless you have a compelling reason not to.

Finishing the install process
Doing so, a command line environment will open. Provided you accepted the default options during the installation process, there will now be a Start menu shortcut to launch Git Bash in the future. You have now installed Git.

Git Bash is the command line interface you will use to configure Git
For Mac
We will walk you through the most common installation process however, there are multiple ways to get Git onto your Mac. You can follow the tutorials at https://www.atlassian.com/git/tutorials/install-git for alternative installation routes.
After downloading the appropriate Git version for Macs, you should have downloaded a DMG file for installation on your Mac. Open this file. This will install Git on your computer. A new window will open.
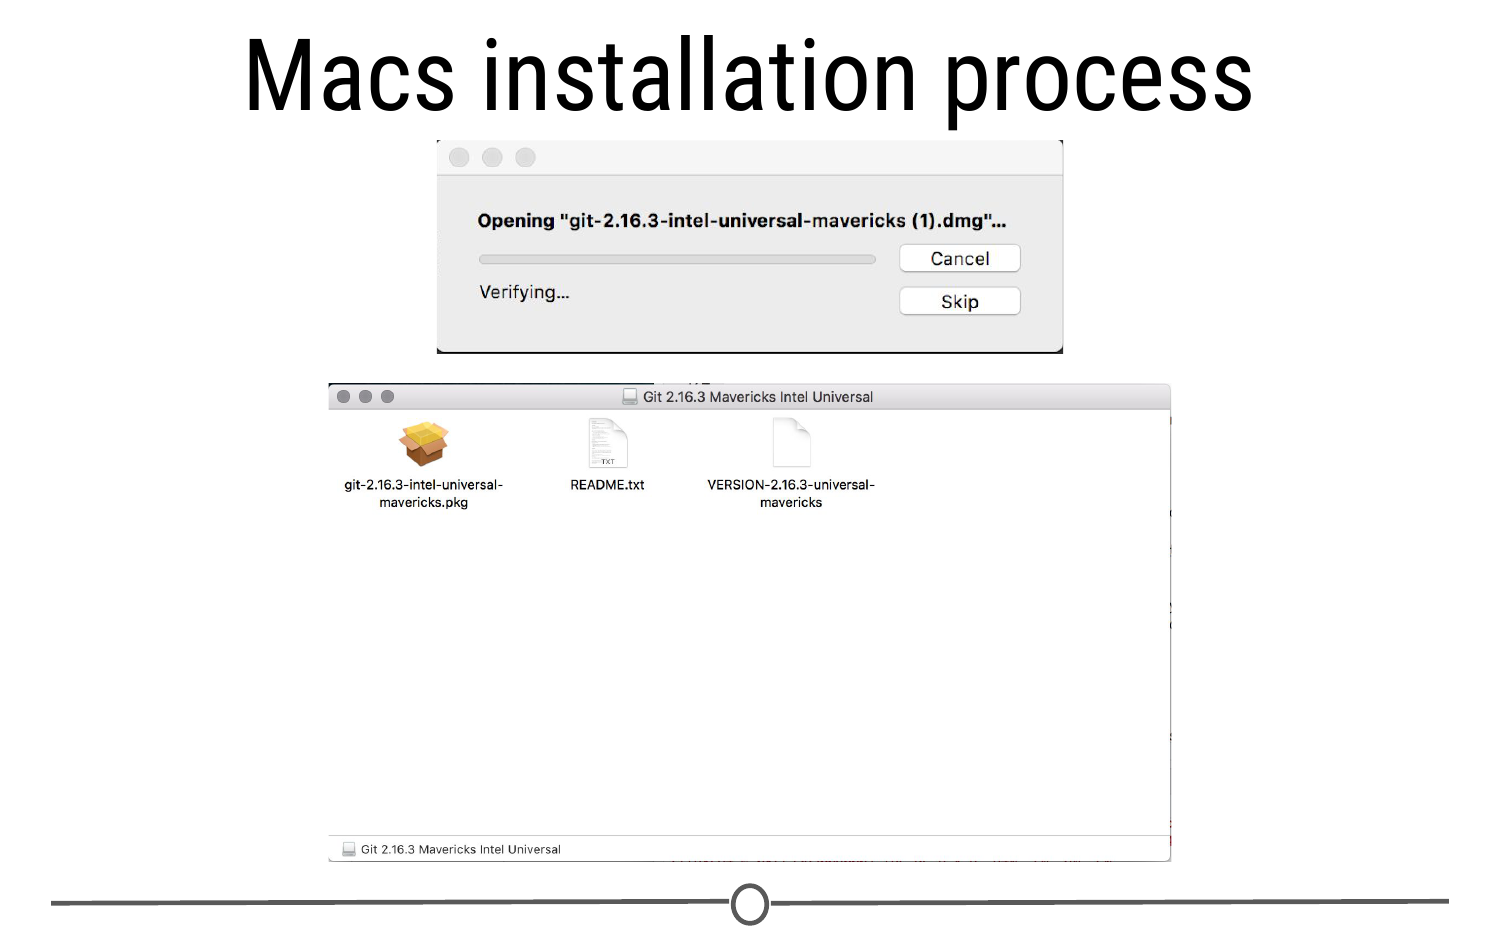
Installation wizard for Git on Mac
Double click on the .pkg file and an installation wizard will open. Click through the options, accepting the defaults. Click Install. When prompted, close the installation wizard. You have successfully installed Git!
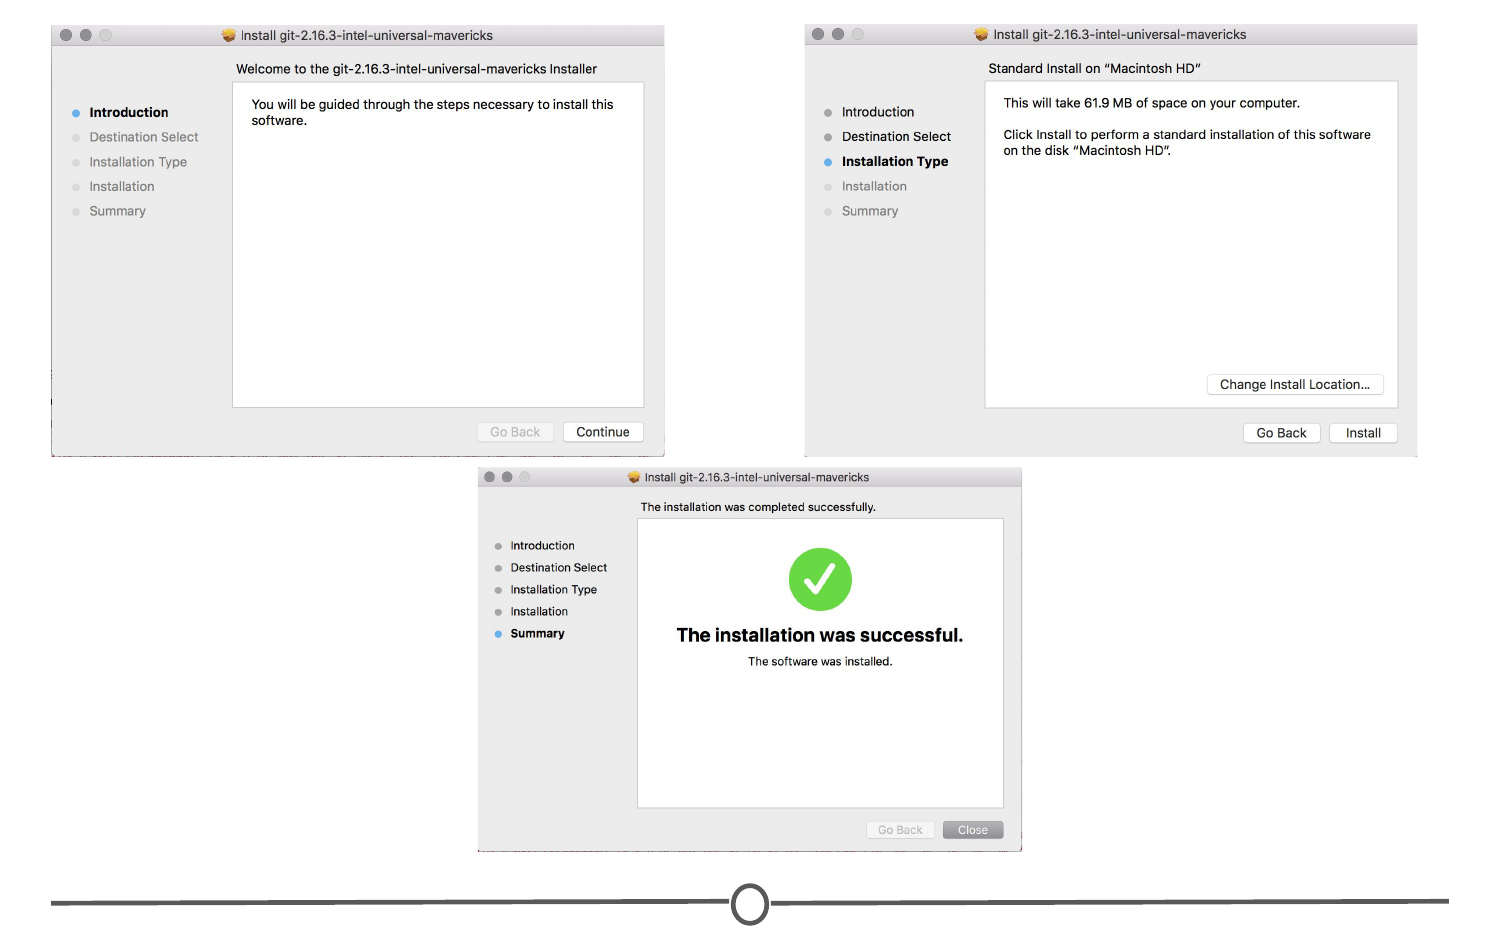
Steps to a successful installation of Git!
Configuring Git
Now that Git is installed, we need to configure it for use with GitHub, in preparation for linking it with RStudio.
We need to tell Git what your username and email are, so that it knows how to name each commit as coming from you. To do so, in the command prompt (either Git Bash for Windows or Terminal for Mac), type: git config --global user.name "Jane Doe" with your desired username in place of “Jane Doe.” This is the name each commit will be tagged with.
Following this, in the command prompt, type:git config --global user.email janedoe@gmail.com MAKING SURE TO USE THE SAME EMAIL ADDRESS YOU SIGNED UP FOR GITHUB WITH!
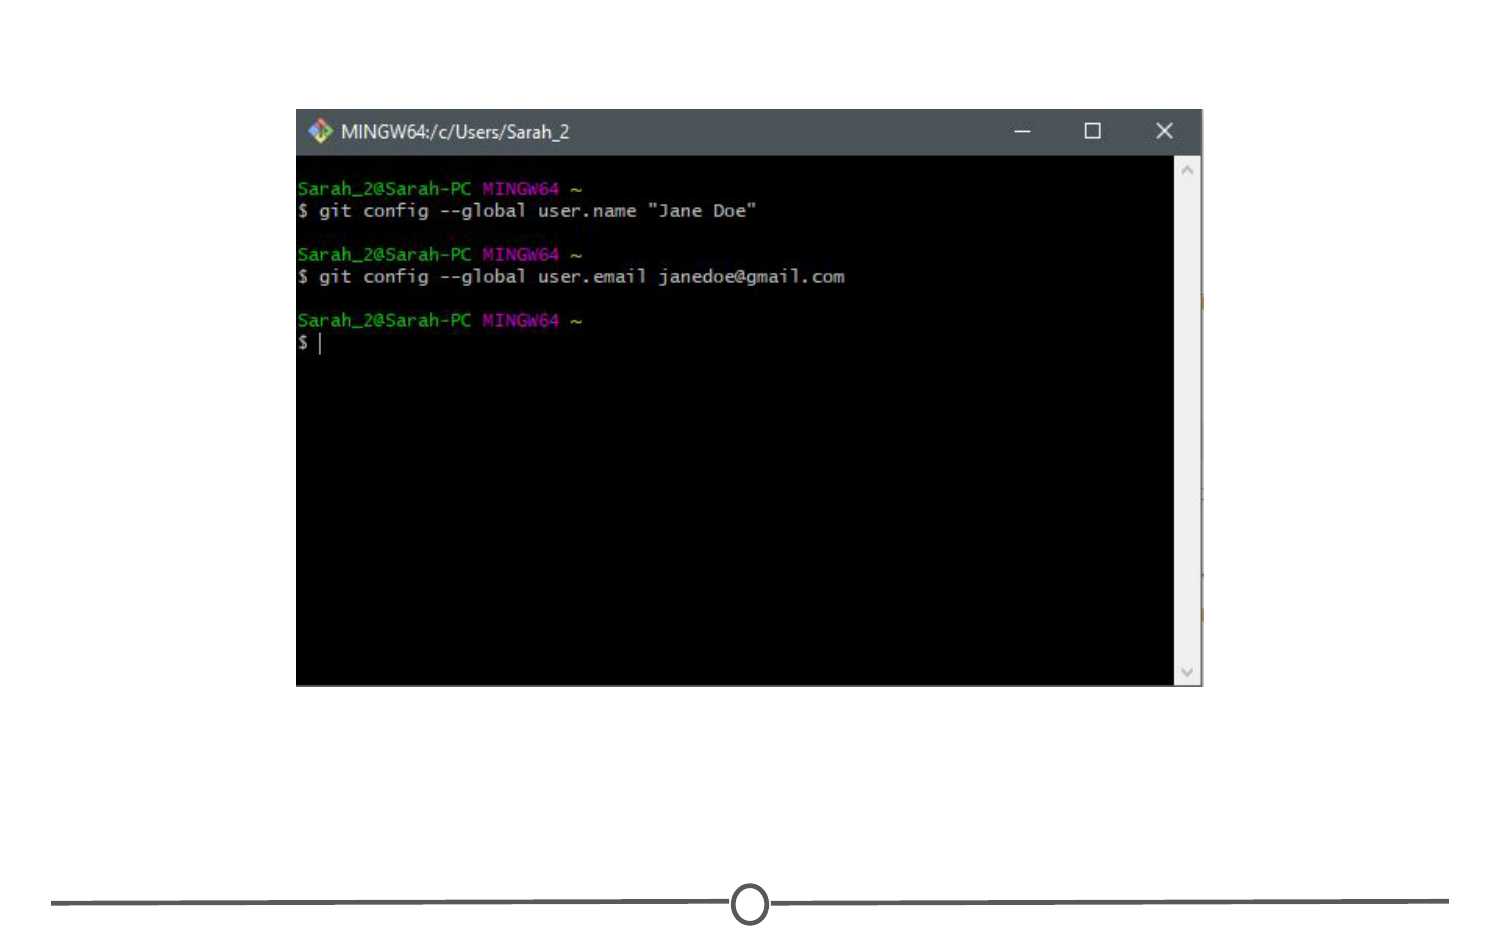
Configuring Git to tag each commit with your name and interface with GitHub
Confirming your configuration
At this point, you should be set for the next step, but just to check, confirm your changes by typing: git config --list
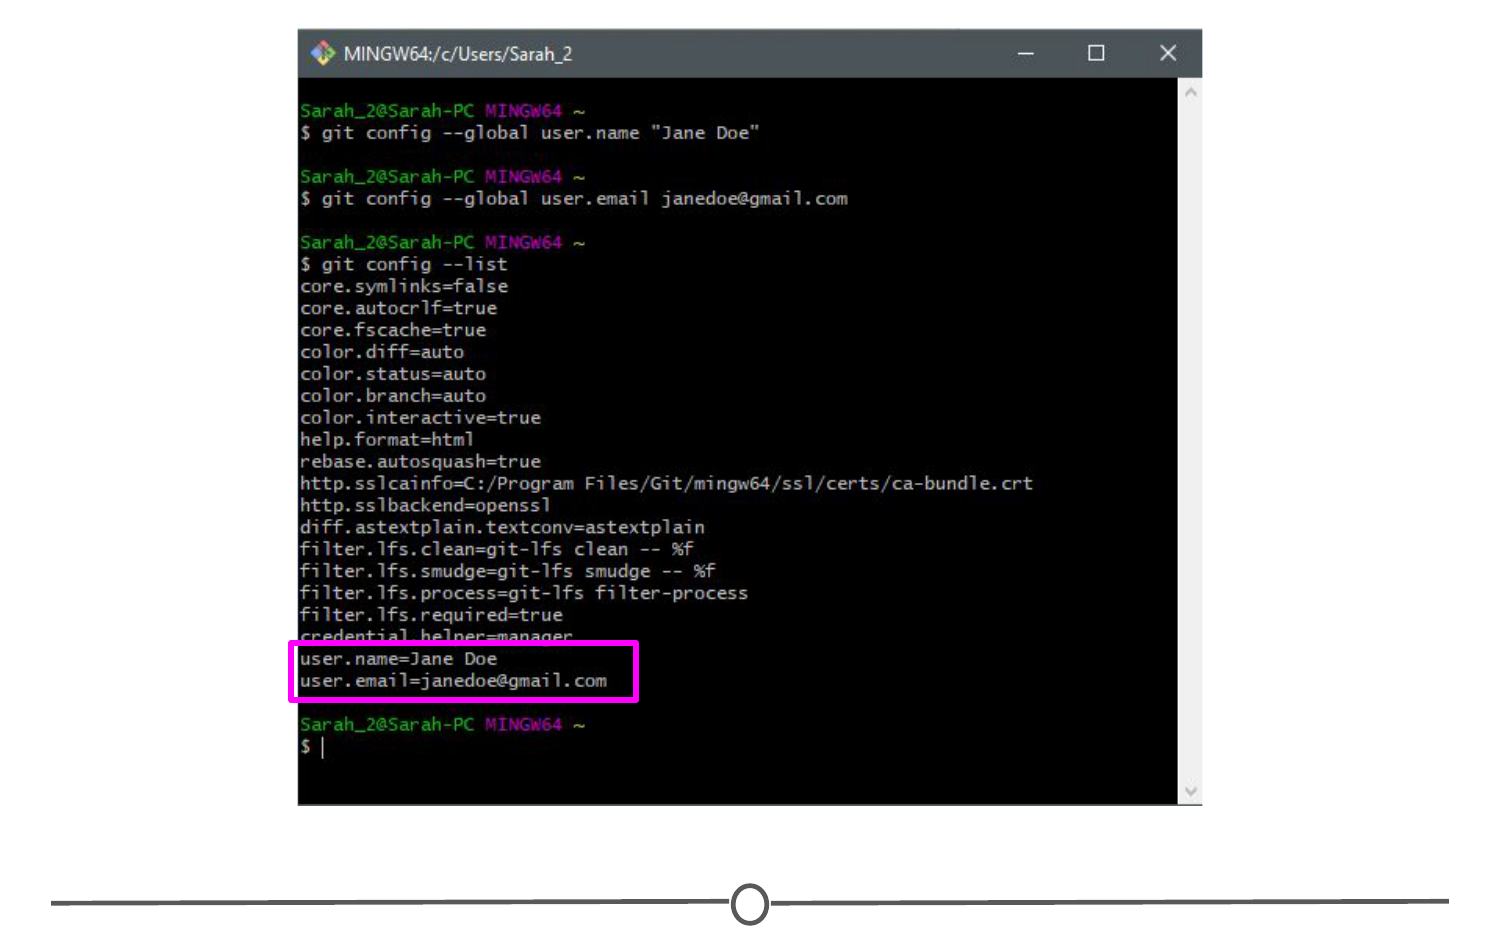
Confirming your user name and user email
Doing so, you should see the username and email you selected above. If you notice any problems or want to change these values, just retype the original config commands from earlier with your desired changes.
Once you are satisfied that your username and email is correct, exit the command line by typing exit and hit Enter. At this point, you are all set up for the next lecture!
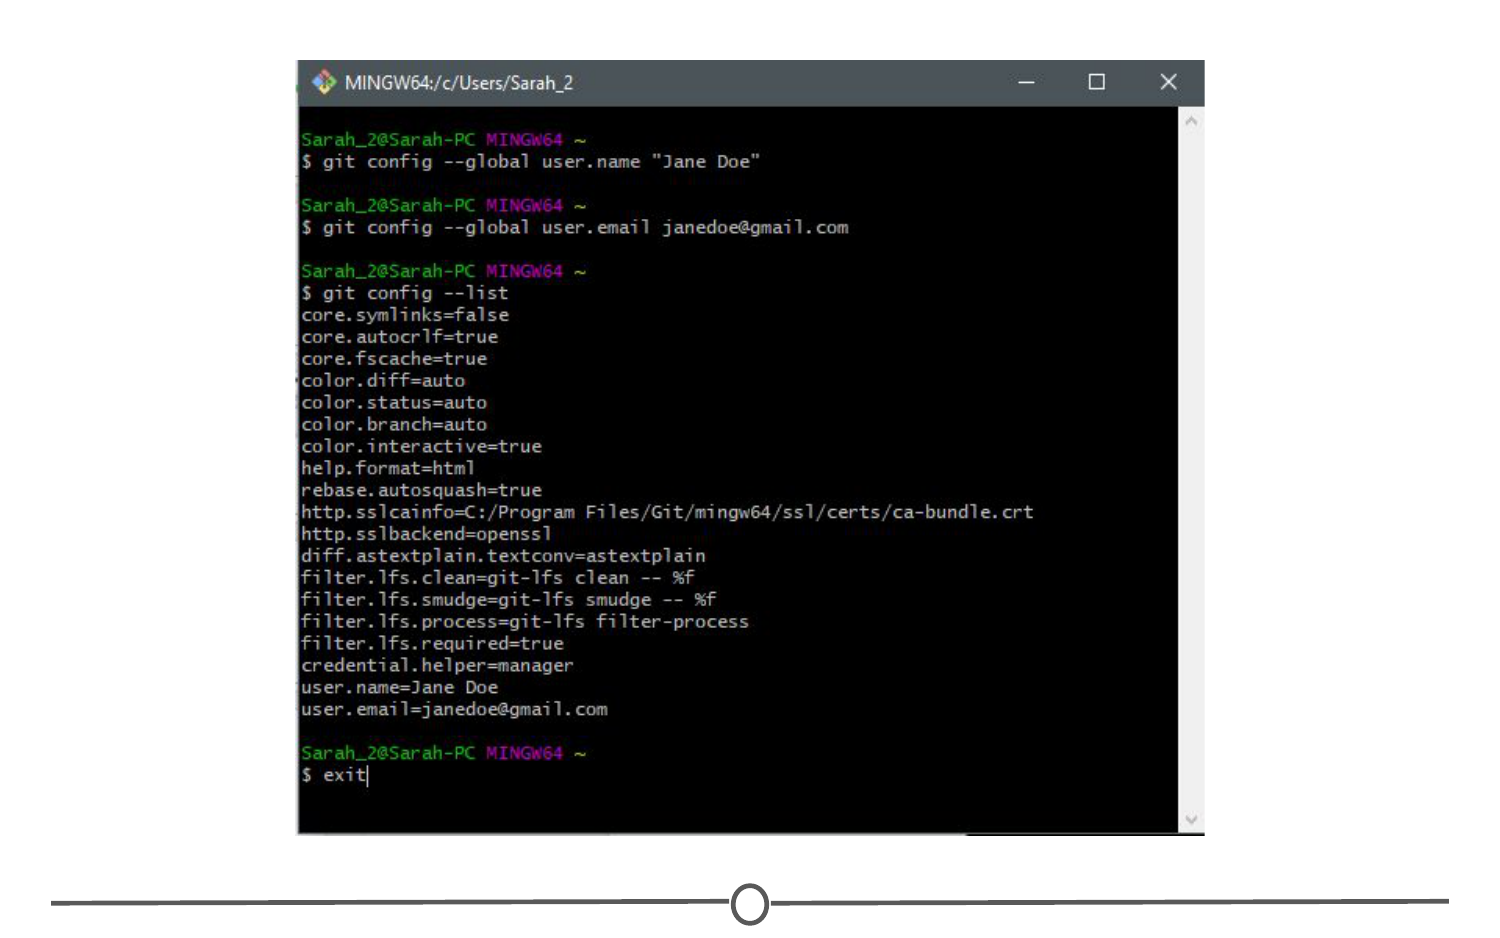
Exiting the command prompt
Summary
In this lesson, we signed up for a GitHub account and toured the GitHub website. We made your first repository and filled in some basic profile information on GitHub. Following this, we installed Git on your computer and configured it for compatibility with GitHub and RStudio.